Build View with IMV Guide
Use TapData’s IMV Guide to design real-time, incremental materialized views that deliver analysis-ready data without complex SQL or heavy ETL. Ideal for BI dashboards, marketing analytics, and API integrations—all with a simple, no-code experience.
This step-by-step guide builds on the real-world ecommerce scenario described in Design Incremental Materialized Views and shows you how to implement it with the IMV Guide.
Prerequisites
Make sure you have already connected your source MySQL database and target MongoDB database in TapData.
If you haven’t set them up yet, see Connect Data Sources.
Procedure
Follow these steps to design your advanced real-time view with nested user profiles and detailed order items.
-
Log in to TapData platform.
-
In the left navigation panel, go to Data Transformation.
-
Click Build Materialized View to open the configuration workspace.
-
Select your main source table. For this scenario, choose orders as your primary data source. This is the top-level collection we’ll enrich with user and item details.

-
Add User Profile as Embedded Document. To bring in rich user details:
- Click + Add Field and choose Embedded Document.
- Enter a field name (e.g.,
user_info) for the embedded object in your main document. - In the field editor, choose the users table and set the join condition on
user_id.
Once configured, you’ll see
user_infoadded on the right with all user fields nested. This preserves the full user profile in the order document—ideal for marketing or segmentation.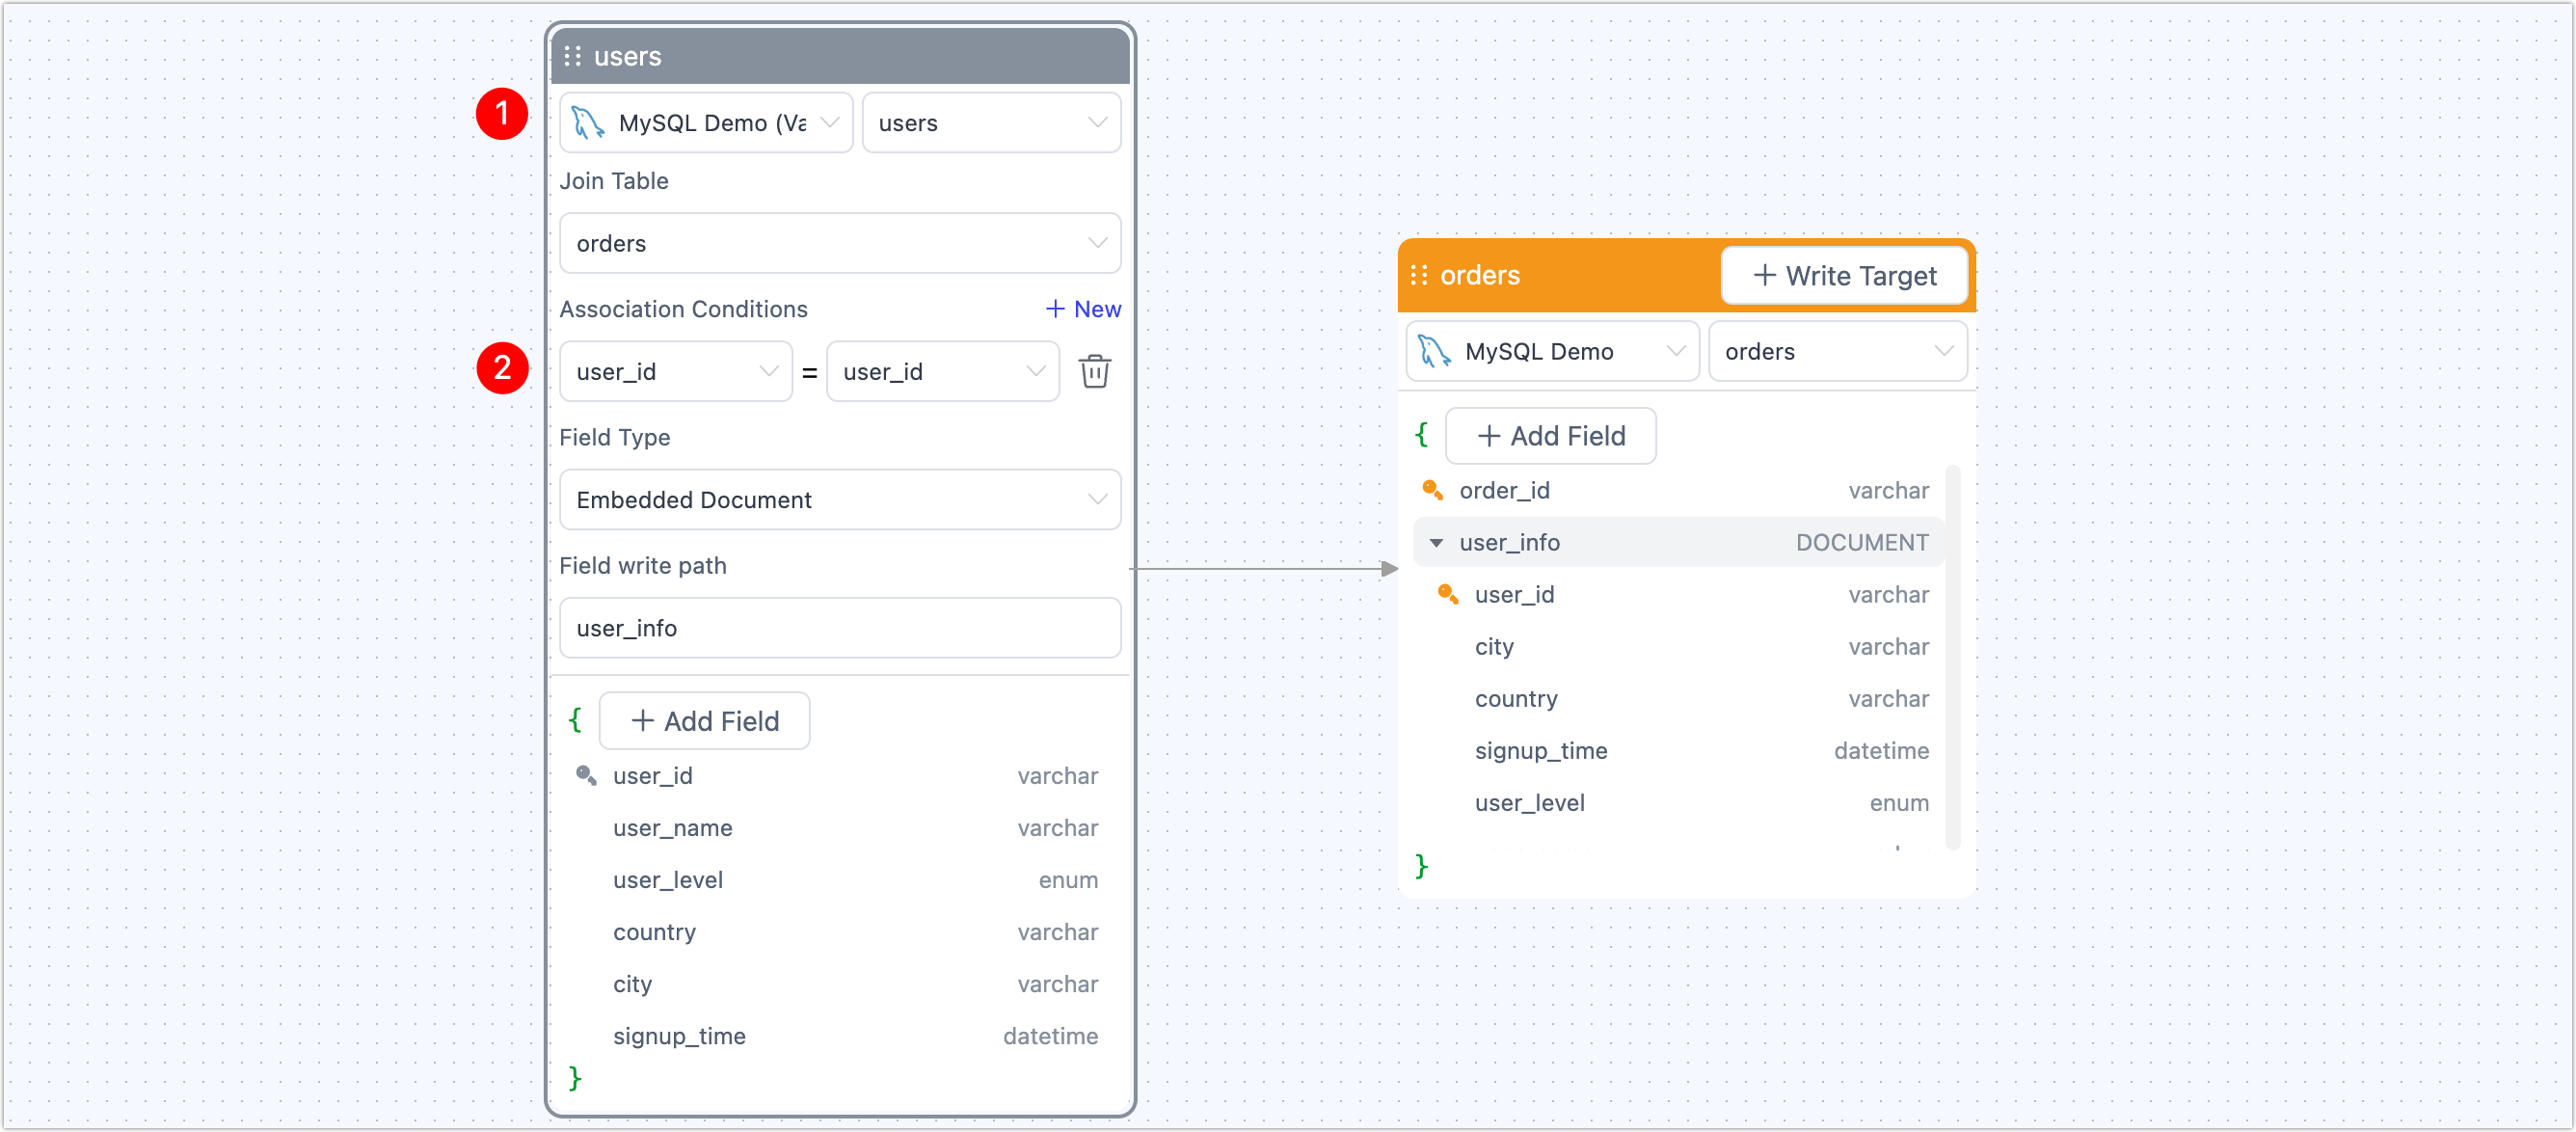
-
Combine Order Items with Product Details as an Embedded Array.
Now let’s link detailed line items:
-
In the main orders section, click + Add Field and choose Embedded Array.
-
Enter a field name (e.g.,
product_items) for the array. -
In the editor, choose the order_items table and set the join on
order_id.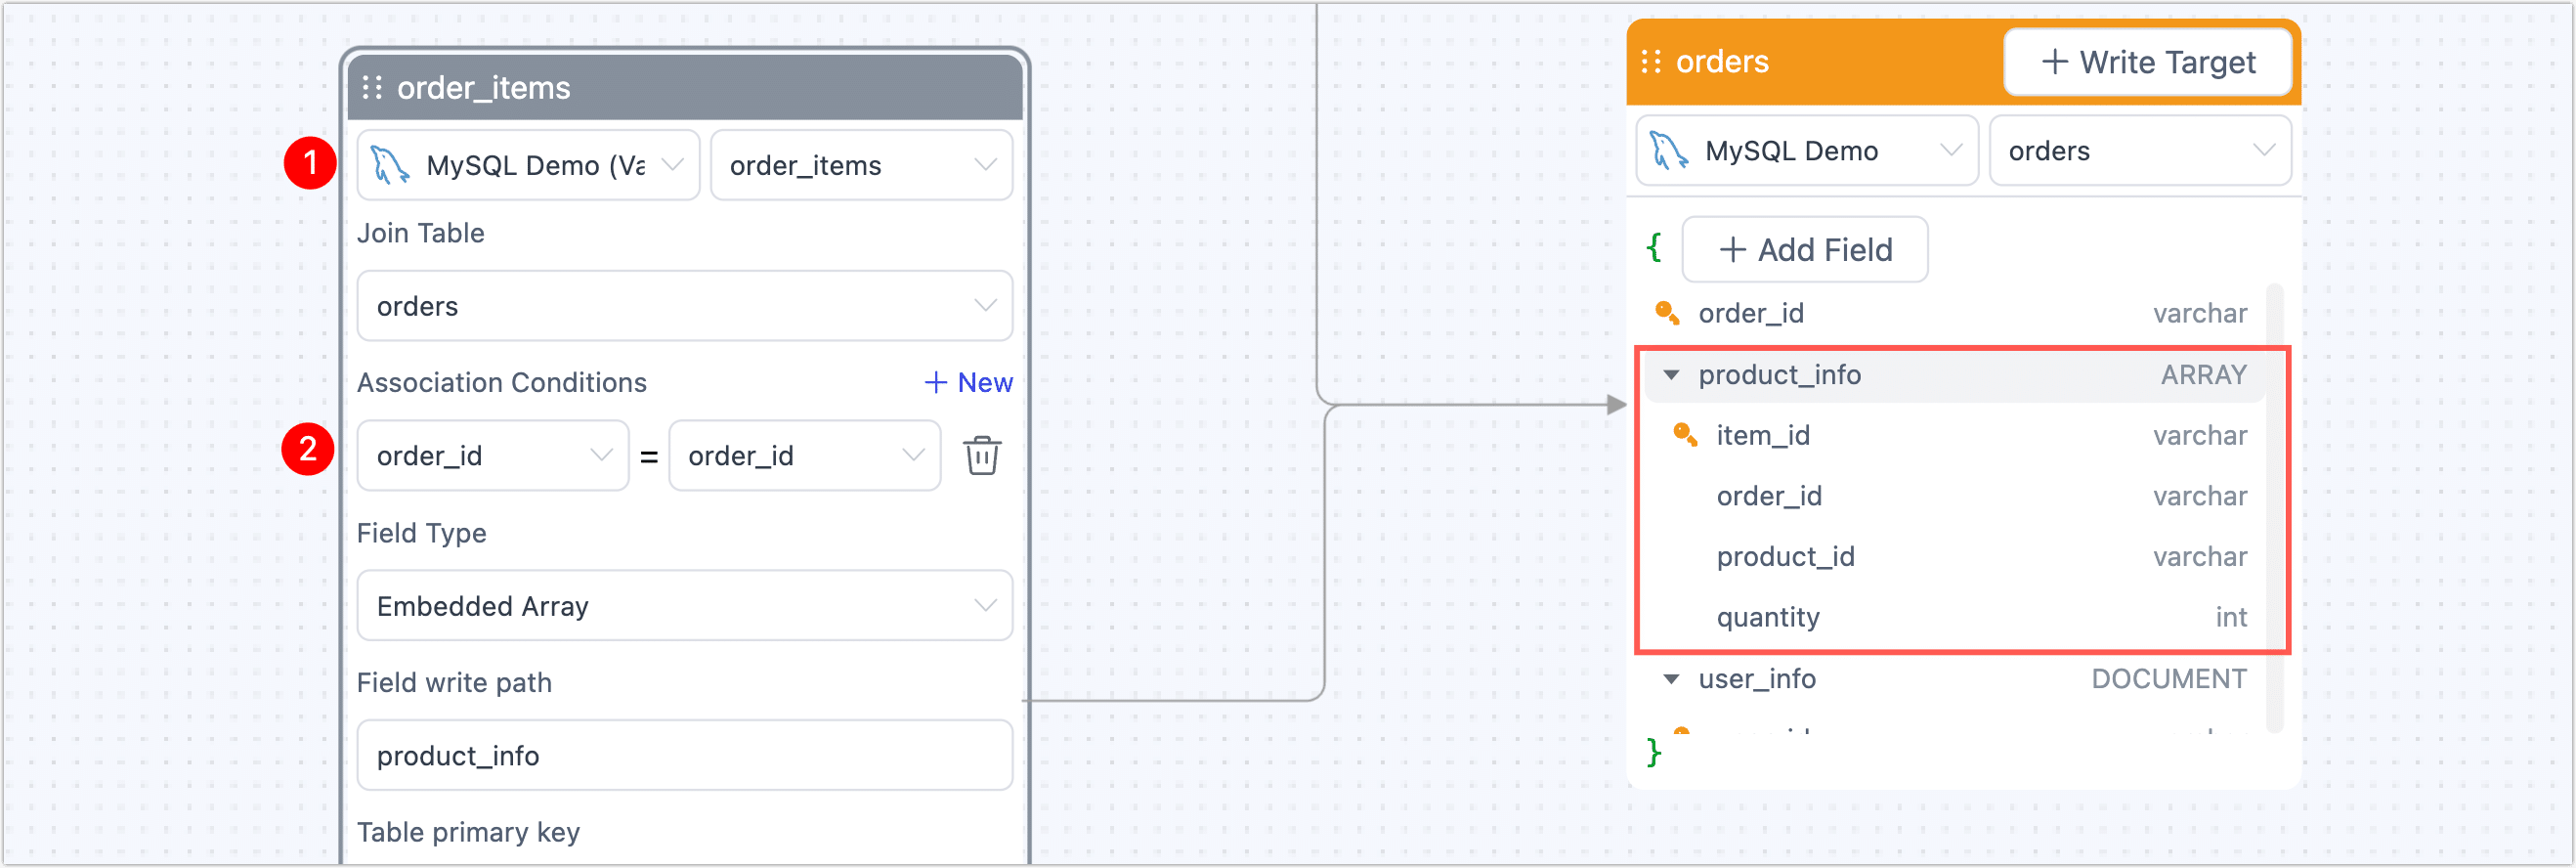
This aggregates all related items for each order as an array—perfect for one-to-many detail.
-
Still within the order_items node, click + Add Field and choose Flatten.
-
Select the products table and join on
product_id.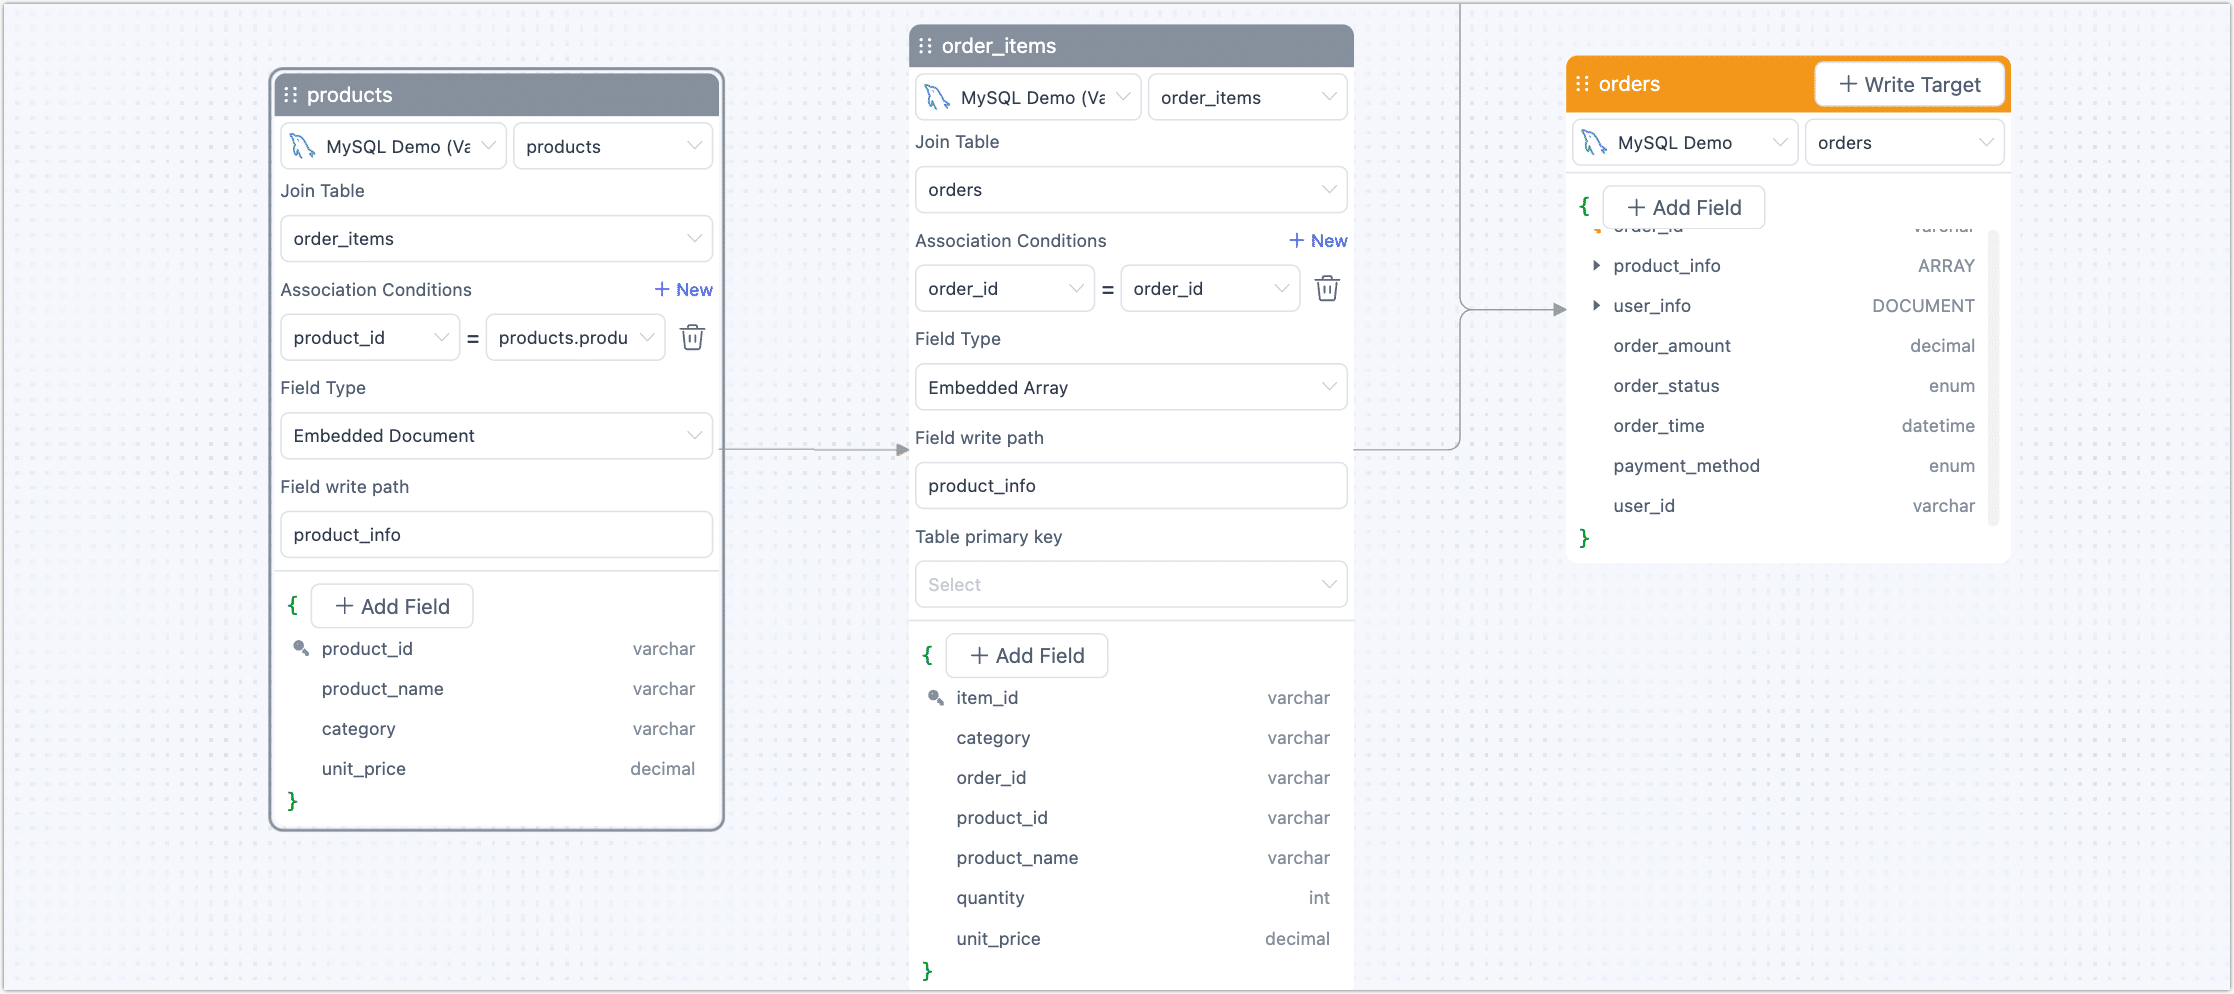
This step enriches each item with product details like name, category, and unit price.
Once complete, the right-side preview shows a fully nested order record with
user_infoand an array of enrichedproduct_items.
-
-
Configure Target Output.
-
Click + Write Target in the top right.
-
Select your MongoDB connection, then enter a target collection name (e.g.,
orders_advanced_imv).The preview on the right shows field mappings and types for the target collection.
-
-
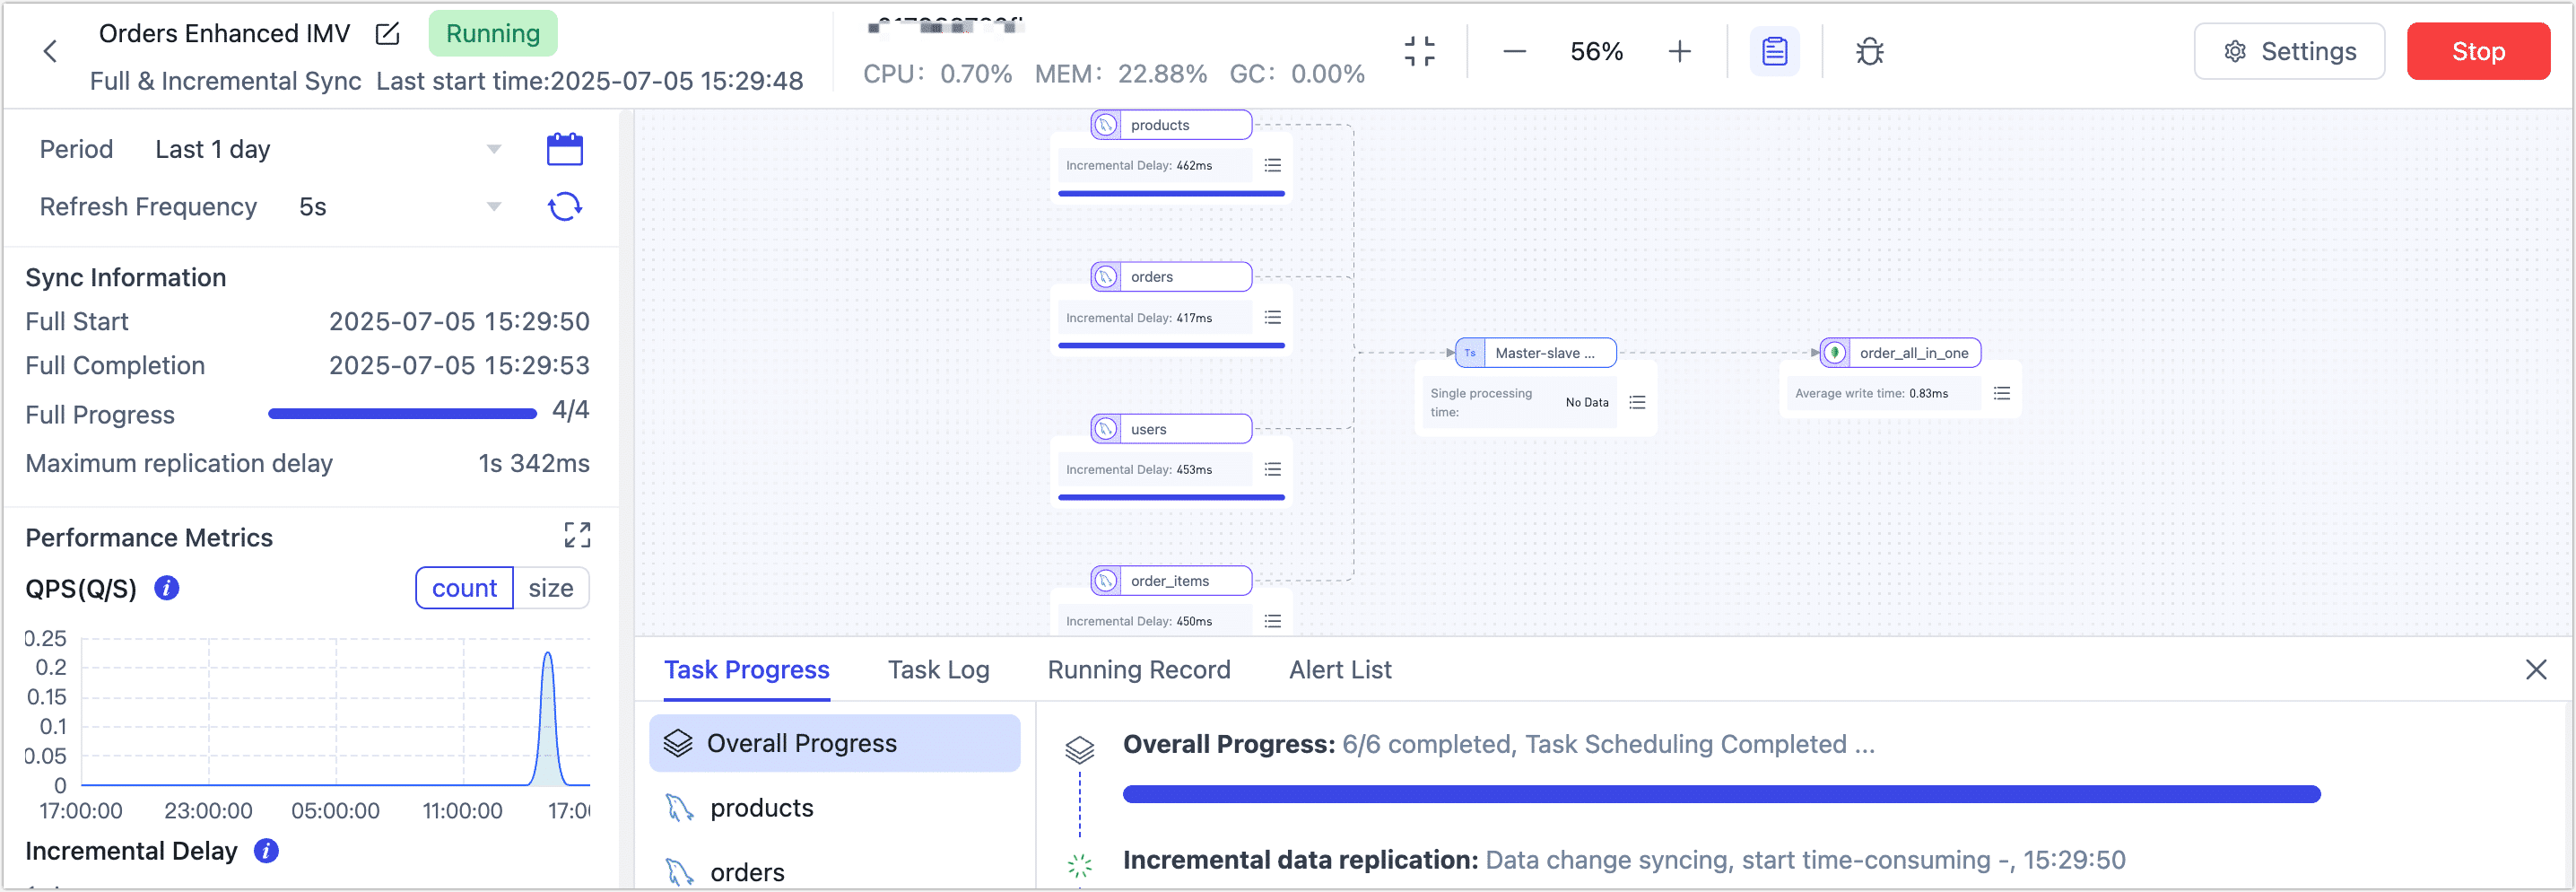
Click Start in the top right to start your real-time materialized view.
After launch, you’ll see the task in the monitoring page with stats like records per second (RPS), latency, and processed event counts.
Verify Results
Once your task is running, log in to your target MongoDB to explore the new view. Here’s an example document illustrating the nested structure:
{
  _id: ObjectId('6868d470d9b9cd512feb6b69'),
  order_id: 'o2001',
  order_amount: Decimal128('759.97'),
  order_status: 'PAID',
  order_time: 2025-01-02T10:00:00.000Z,
  payment_method: 'CREDIT_CARD',
  user_id: 'u001',
  product_items: [
    {
      quantity: 1,
      item_id: 'i3001',
      product_id: 'p101',
      order_id: 'o2001',
      category: 'Electronics',
      product_name: 'Smartphone',
      unit_price: Decimal128('699.99')
    },
    {
      quantity: 2,
      item_id: 'i3002',
      product_id: 'p102',
      order_id: 'o2001',
      category: 'Accessories',
      product_name: 'Phone Case',
      unit_price: Decimal128('29.99')
    }
  ],
  user_info: {
    city: 'New York',
    country: 'USA',
    signup_time: 2024-12-20T12:00:00.000Z,
    user_id: 'u001',
    user_level: 'GOLD',
    user_name: 'Alice'
  }
}
This structure is analysis-ready, API-friendly, and tailored for real-time use. Analysts can easily filter and aggregate orders, marketing can segment by user attributes, and developers can serve complete order details in a single API response without expensive joins.
What’s Next?
- Monitor your task to track throughput and latency in real time.
- Validate data accuracy using built-in tools or source queries.
- Publish the view as an API so other teams or systems can consume fresh, structured order data via REST or GraphQL.